Trashcans. Umm, is there anything less romantic or less exciting than trashcans? Not much.
Well, my buddies at The Container Store have changed all that.
Take your trashcans from boring to beautiful with help from The Container Store!
My mom has always sworn that the only place to get trashcans is at The Container Store. And, I am continuing that trashcan legacy…with my own little twist on it.
For the past 5 years, I’ve had trashcans from The Container Store, that I decorated with some fun glitter stickers, to just give me a little daily delight when I go to throw something away. Hey, it really is the little things, people.
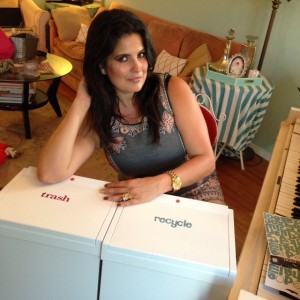
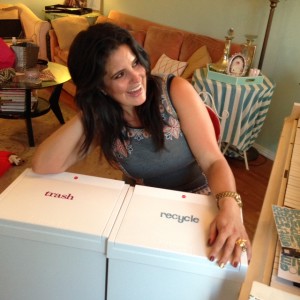
So, when those trashcans started looking a little sad and worn, I went right back over to The Container Store, picked up 2 of their Halo trashcans, and picked up a few packages of glitters to make ’em sparkle.
Here’s how I did it, and how you can, too!
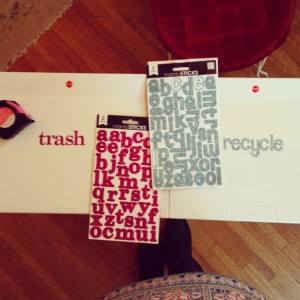
Our “Ingredients”
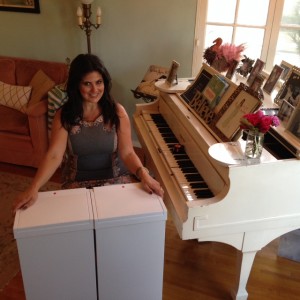
*2 trashcans from The Container Store (1 for trash & 1 for recycling)
*Glitter Alphabet stickers from The Container Store ($3.99 per package)
*1 pencil
* Tape measurer
1) Start with white, black or metal trashcans. They can be as basic as these white Halo touch lid trashcans, ‘cuz don’t worry, we’re gonna spruce ’em right up!
1) Start with simple, basic trashcans with a flat, non-textured lid.
2) Take that tape measurer, and measure the trashcan lid from top to bottom, marking the midpoint with the pencil.
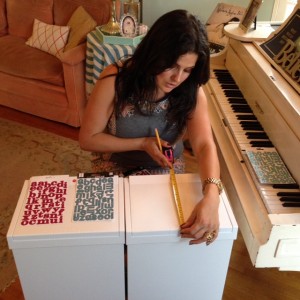
Measure the trashcan and find your midpoint.
3) Using the side of the sticker package, draw a light line with the pencil, which will help you place the letters in a straight line.
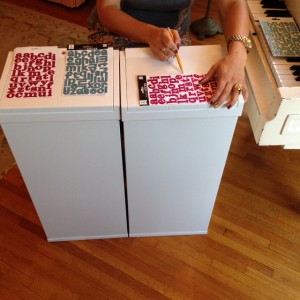
Using the side of the sticker package, draw a light line, to help with straight placement of letters.
4) Stick on those stickers – and that’s it – ta-dah!!! You’ve got sparkling trashcans, my friend.
The ingredients for this BF Trashcan DIY create a sparkling trash experience. Wait. That sounded way cheesier than I thought I would.
Nothin’ trashy about a little sparkle, at all…
And it can be fun for the whole family – and, not to mention – suuuuper easy!
xoxo,
Dawn


